Get-TrackingInfo

It’s been a while since I have posted something, so here is a quick little function that can help you track your USPS packages right from your Powershell Console!

Example: Get-TrackingInfo -Trackingnumber YOUR-TRACKING-NUMBER-HERE

<#
 .Synopsis
    Track your USPS Packages
 .DESCRIPTION
    Track your USPS Packages right from the Powershell Console
 .EXAMPLE
    Get-TrackingInfo -Trackingnumber 555555555555
 #>
function Get-TrackingInfo  {
    Param([Parameter(Mandatory=$true)] $TrackingNumber)
    $invoke = (Invoke-Webrequest https://tools.usps.com/go/TrackConfirmAction?tLabels=$TrackingNumber).allelements | Where-Object  {$_.tagname -eq "tr" } 
    $information = $invoke | Select-Object OuterText -Unique -Skip 3
    $information | Format-Table @{Label=’Tracking Information’;Expression={$_.OuterText}}
}

Unable to use your Windows Hello PIN?

Have you recently replaced your motherboard and now you cannot use your Windows Hello Pin? Try logging in with an Administrator account and deleting everything inside of the following directory:
C:\Windows\ServiceProfiles\LocalService\AppData\Local\Microsoft\NGC

That should clear your PIN and allow you to create a new one in Settings > Accounts > Sign-in Options.

Prevent users from creating Office 365 Groups

The script below will block users in a specified OWA Policy from creating Office 365 groups. The script uses Out-GridView to allow you to select which OWA Policy you want to assign this rule to.

#Office 365 Credentials
$username = "USERNAME"
$password = "PASSWORD"

try {
    #Attempts to connect to Office 365 and install Modules
    Import-Module MSOnline
    $pass = convertto-securestring -String "$password" -AsPlainText -Force 
    $credential = new-object -typename System.Management.Automation.PSCredential -argumentlist $username, $pass
    Connect-MsolService -Credential $credential -ErrorAction Stop
    $ExchangeSession = New-PSSession -ConfigurationName Microsoft.Exchange -ConnectionUri "https://outlook.office365.com/powershell-liveid/" -Credential $credential -Authentication "Basic" -AllowRedirection
    Import-PSSession $ExchangeSession >null
}
catch [Microsoft.Online.Administration.Automation.MicrosoftOnlineException] {
    #Logs error for incorrect password
    Write-Host "Please verify your username and password"
    Write-EventLog -LogName Application -Source "Office 365 Log" -EntryType Error -EventId 1 -Message "OFFICE 365 AUTOMATIC LICENSE ASSIGNMENT`n`nError Connecting to Office 365! Please verify your user name and password"
    exit
}

catch {
    #Log for any other error
    Write-Host "Error Connecting"
    Write-EventLog -LogName Application -Source "Office 365 Log" -EntryType Error -EventId 1 -Message "OFFICE 365 AUTOMATIC LICENSE ASSIGNMENT`n`nError Connecting to Office 365!"
    exit
}
$OWA = Get-OwaMailboxPolicy | Select Identity | Out-Gridview -Title "Select one or more OWA Policies" -PassThru | foreach { $_.Identity } 
if($OWA.count -eq 0) {
    Write-Host "Please rerun the script and select an OWA Policy"
}
else {
    if($OWA.count -gt 1) {
        foreach($MultiOWA in $OWA) {
            Set-OwaMailboxPolicy -Identity $MultiOWA -GroupCreationEnabled $False
        }
    }
    else {
        Set-OwaMailboxPolicy -Identity $OWA -GroupCreationEnabled $False
    }    
}

Automate your Meraki Client VPN Connection

Cisco does a great job with their documentation but unfortunately they didn’t do so well with explaining how to configure their VPN connection for medium to large scale companies. Their documentation only explains how to configure the connection manually, so I decided to use my Powershell skills to write up something really quick. Luckily for us, this task is extremely simple with Powershell.

The following script will automatically configure your Meraki VPN connection on Windows 10:

$ServerAddress = "VPN SERVER ADDRESS"
$ConnectionName = "VPN CONNECTION NAME"
$PresharedKey = "YOUR PRESHARED KEY"
Add-VpnConnection -Name "$ConnectionName" -ServerAddress "$ServerAddress" -TunnelType L2tp -AllUserConnection -L2tpPsk "$PresharedKey" -AuthenticationMethod Pap -Force

This script can be deployed using GPO, your existing system management system or even added to your images with MDT or SCCM.

I hope this helps someone out!

Automatically join a machine to your domain

This short script will join a machine to your domain. This can be useful as a post start up script that will launch after a machine has been imaged.

$domain = "DOMAIN"
$password = "PASSWORD HERE" | ConvertTo-SecureString -asPlainText -Force
$username = "$domain\USERNAME HERE" 
$credential = New-Object System.Management.Automation.PSCredential($username,$password)
Add-Computer -DomainName $domain -Credential $credential

Feel free to comment if you have any questions!

Operating System Audit

Recently I noticed that Kaseya (our system management system) does not always update the operating system name when a computer has been upgraded. It can take a while for a computer to report back in and provide accurate information. Since we finished up our Windows 10 upgrades, we wanted to be 100% sure that we upgraded all our machines. So to verify this information I wrote a script to find out every machine’s operating system in our network.

Read more

Universal Uninstall and Install Script

Recently, I decided to make a Powershell script that will make it easier for larger environments to uninstall and upgrade software. This is a continuation of the script that I wrote a while back ago that can find uninstall strings for 32 and 64bit applications (Link). Similar to the previous script, this script will automatically find the uninstall string for the specified program, but now it will also uninstall the program and install an upgraded version with the install file that you picked.

Read more

One Column Start Layout

If you haven’t done it already, please read my post on how to deploy a customized start menu in your Windows 10 image.

Do you have a similar start layout that you would prefer to slim down and not have to do it manually for each profile?

Well you can do this by configuring LayoutModification.xml to display only one main column and all you have to do is edit the following line:

<LayoutOptions StartTileGroupCellWidth="6" />

And add StartTileGroupsColumnCount=”1″

<LayoutOptions StartTileGroupCellWidth="6" StartTileGroupsColumnCount="1" />

Customize a Windows 10 Start Layout

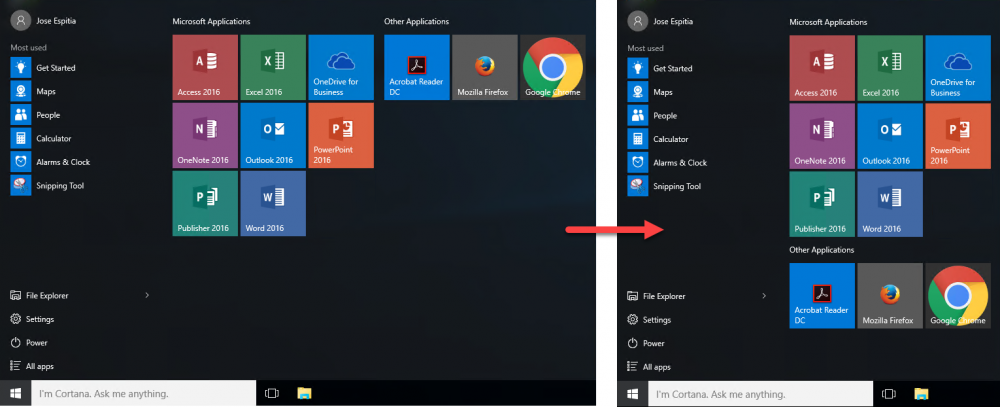
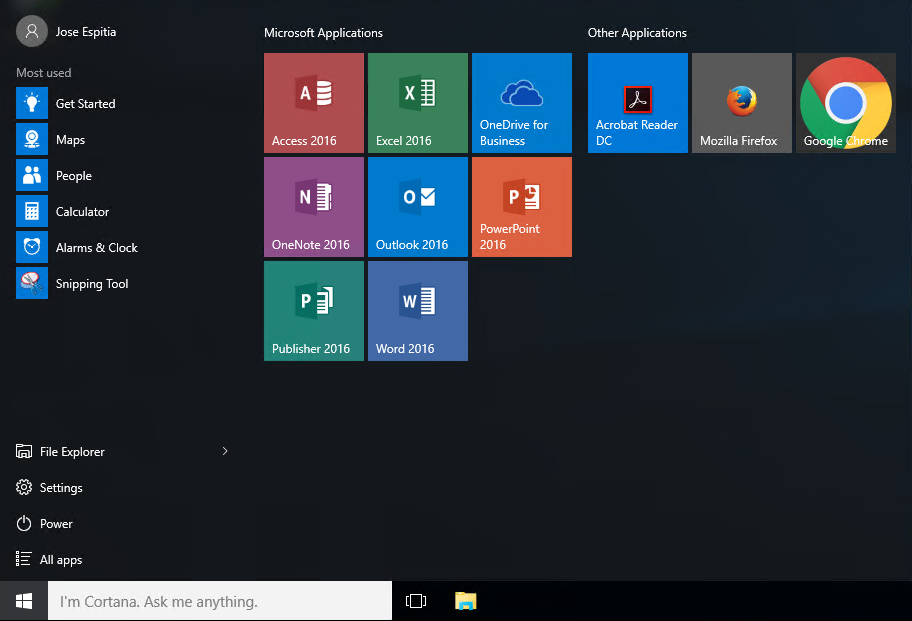
To customize the Start Menu in your images, you will need to export a ‘reference’ Start Menu using the Export-StartLayout PowerShell cmdlet.

First you will need to setup the Start Menu exactly the way you want it, and then export the layout.

Export-StartLayout –path C:\LayoutModification.xml

Now, you can import the custom XML into the Default profile before sysprep.
Note: Only new user profiles will be able to see the new layout

Import-StartLayout -LayoutPath LayoutModification.xml -MountPath $env:SystemDrive\

If for some reason you have problems with the import, you can just copy the custom XML file into the Default profile.
Note: Only new user profiles will be able to see the new layout

copy /y LayoutModification.xml “C:\Users\Default\AppData\Local\Microsoft\Windows\Shell”

Launch a hidden Powershell script


This short VBscript will launch a hidden Powershell script without any windows:

command = "powershell.exe -nologo -ExecutionPolicy Unrestricted -File C:\script.ps1"

set shell = CreateObject("WScript.Shell")

shell.Run command,0