ConfigMgr

Automatically update your Configuration Manager boot images for CVE-2023-24932

As many of you know, CVE-2023-24932 will require Configuration Manager admins to update their boot media before their organization or Microsoft enforces the revocations. If you do not update your boot images before the revocations are applied, you will not be able to load an unpatched WinPE image. Community members like Gary Blok and Sassan Fanai have already shared some excellent scripts that will automatically update your boot image. I just wanted to take it an extra step by automating some of the manual steps that would have to be performed. Using the ConfigMgr Module, we’re able to query the boot images to determine which updates are needed, find the update source URL for the May CU, then eventually update the boot image and reload the boot image properties so the console shows the correct build number. This will hopefully streamline the process for the community.

Credit:

Many thanks to Gary Blok for collaborating with me and helping improve the script!

References:

Requirements:

  • The Configuration Manager module needs to be loaded before running the script
  • If you have a Windows 11 boot image, please run the script on a Windows 11 host. DISM fails to apply the update if you do not.

Parameters:

  • WIMFolder
    • Local folder that will be used to store the boot image WIM temporarily
  • MountFolder
    • Local folder where we will mount the boot image.
  • DownloadFolder
    • Local folder that will be used to store the downloaded May 2023 Cumulative Update

Script:

Convert-CMAppToIntuneWin Function

The following function will automatically convert your ConfigMgr applications to .intunewin files that can be used in Intune to deploy Win32 applications. In my environment, we are using PSADT (Powershell App Deployment Toolkit) so this function worked great to convert my existing install scripts to something that I can use in Intune. Once the function has completed converting your applications, it will open the folder that will contain a subfolder for each Deployment Type that the application had. In those subfolders, you will find the .intunewin files.

Just keep in mind that if your install command in ConfigMgr is calling a file that is not in the content source path, the Convert-CMAppToIntune function will exit since the Win32 Content Prep Tool requires the setup file to exist with the content.

Requirements:

  • Internet Connection (this is required to download the Win32 Content Prep Tool from Microsoft’s official Github repository)
  • The setup file that you are calling in the install command must reside in the content source path.
  • You must be trying to convert a Win32 application install
  • ConfigMgr Module (Click here to learn how to load the module)

Parameters:

  • AppName (Required)
    • You will have to use the exact application name that you are using in ConfigMgr
  • OutputFolder (Optional)
    • By default the function will stage everything into your %TEMP% folder. However you can use this parameter to override that default location and stage your converted files anywhere.

Examples:

Convert-CMAppToIntuneWin -AppName "Google Chrome"
Convert-CMAppToIntuneWin -AppName "VLC Media Player" -OutputFolder "D:\Intune"

Convert all of the applications in your ConfigMgr console:

Get-CMApplication | ForEach-Object { Write-Host "Converting $($_.LocalizedDisplayName)" ; Convert-CMAppToIntuneWin -AppName $_.LocalizedDisplayName }

Script:

Automatically download Enablement Packages

Happy New Years everyone! I was recently reading a blog post by Gary Blok that explained how to upgrade to Windows 10 21H2 via Enablement Package using the ConfigMgr App Model. It is a great article and I actually plan on using an Enablement Package to upgrade all of my 20H2 PC’s to 21H2. However, due to my anxiety I didn’t like that I actually had to setup an ADR to download the Enablement Package. So instead of using an ADR, I wanted to see if I could accomplish this with the ConfigMgr Powershell CMDLETs. Fortunately with ConfigMgr 2107, Microsoft released a new CMDLET Get-CMSoftwareUpdateContentInfo that can help us easily retrieve the source path for the Enablement Package .cab files. All you need to make this work is a site with 2107 installed, ConfigMgr console installed on the device that you are running the script, Powershell 3.0 and above, and the following Products and Classifications:

Product: Windows 10

Classification: Upgrades

Powershell Script:

$DownloadFolder = "$env:TEMP\Enablement Packages"

If(!(Test-Path "$DownloadFolder")) { New-Item "$DownloadFolder" -ItemType Directory -Force }

Get-CMSoftwareUpdate -Fast | Where-Object { $_.LocalizedDisplayName -like "*Enablement Package" } | ForEach-Object {

    $SourceURL = (Get-CMSoftwareUpdateContentInfo -Id $_.CI_ID).SourceURL
    $LocalizedDisplayName = $_.LocalizedDisplayName -replace '(?= via Enablement Package).*',''

    If(!(Test-Path "$DownloadFolder\$LocalizedDisplayName")) { New-Item "$DownloadFolder\$LocalizedDisplayName" -ItemType Directory -Force }
    Invoke-WebRequest -Uri $SourceURL -OutFile "$DownloadFolder\$LocalizedDisplayName\$(($SourceURL -replace '.*([/])','').Split('_')[0]).cab"

}

Start $DownloadFolder

Create custom environment variables for ConfigMgr

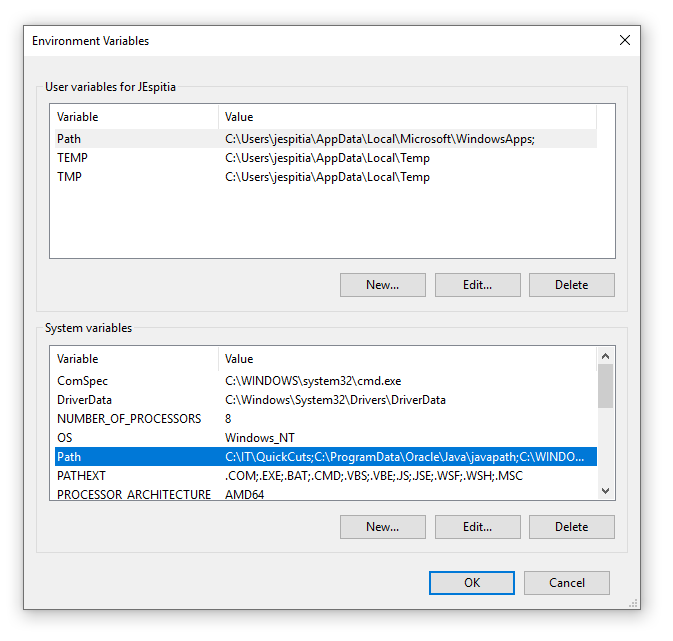
Have you ever wanted a quick shortcut on your clients that would allow you to access the Software Center, ConfigMgr Control Panel Applet and the CCM logs folder by just running a simple variable? Well the script below will automate the entire process for you. The following variables will be configured in the script:

  • CM
    • Launches the Configuration Manager Control Panel Applet
  • CMSC
    • Launches the Software Center
  • CMLogs
    • Opens %SystemRoot%\CCM\Logs

This makes accessing these commonly used resources as easy as hitting Windows + R and typing CM, CMSC, or CMLogs on the client machine.

Powershell Script:

$QuickcutDir = "C:\IT\Quickcuts"

If(!(Test-Path $QuickcutDir)) {

    New-Item $QuickcutDir -ItemType Directory -Force

}

$Shortcut = (New-Object -ComObject WScript.Shell).CreateShortcut("$QuickcutDir\CM.lnk") 
$Shortcut.TargetPath = "$($env:SystemRoot)\CCM\SMSCFGRC.cpl" 
$Shortcut.WorkingDirectory = "$($env:SystemRoot)\CCM" 
$Shortcut.IconLocation = "$($env:SystemRoot)\CCM\SMSCFGRC.cpl,0" 
$Shortcut.Save()

$Shortcut = (New-Object -ComObject WScript.Shell).CreateShortcut("$QuickcutDir\CMLogs.lnk") 
$Shortcut.TargetPath = "$($env:SystemRoot)\CCM\Logs"
$Shortcut.WorkingDirectory = "$($env:SystemRoot)\CCM" 
$Shortcut.IconLocation = "$($env:SystemRoot)\system32\imageres.dll,3" 
$Shortcut.Save()


$Shortcut = (New-Object -ComObject WScript.Shell).CreateShortcut("$QuickcutDir\CMSC.lnk") 
$Shortcut.TargetPath = "softwarecenter:"
$Shortcut.IconLocation = "$($env:SystemRoot)\CCM\scclient.exe,0" 
$Shortcut.Save()

$Path = (Get-ItemProperty -Path "HKLM:\SYSTEM\ControlSet001\Control\Session Manager\Environment").Path
$NewPath = "$QuickcutDir;" + $Path

If($Path -notlike "*$QuickcutDir*") {

    Set-ItemProperty -Path "HKLM:\SYSTEM\ControlSet001\Control\Session Manager\Environment" -Name Path -Type String -Value "$NewPath"

}

Get-Process Explorer | Stop-Process

Automatically remove inactive devices that do not exist in AD

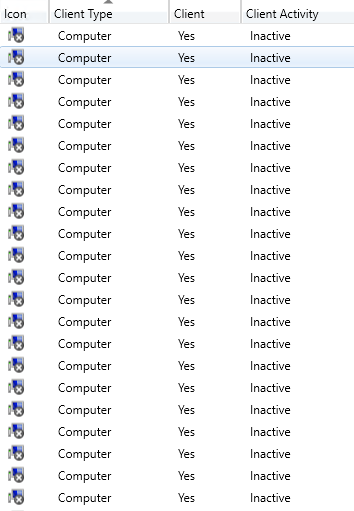
The following script will query Configmgr for inactive devices and automatically remove them if they are no longer in Active Directory. Personally I prefer this simple script over the built in Configmgr maintenance task (Delete Inactive Client Discovery Data) because the task does not check Active Directory and it will remove any inactive device with the criteria that you have configured. By default, this maintenance task will remove any device that has been inactive for 90 days. At least in my environment, if a computer does not exist in Active Directory it should not be in MEMCM so I have the script run on a daily basis as a scheduled task to remove the devices that are not in AD.

Keep in mind to not run this script if you have workgroup computers because they will be deleted since they are not in AD.

Powershell Scripts:

Single Domain Environment:

$InactiveClients = Get-CMDevice | Where-Object { $_.ClientActiveStatus -eq 0 -or $_.ClientActiveStatus -eq $null -and $_.Name -notlike "*Unknown Computer*"}

ForEach($InactiveClient in $InactiveClients) {
    
    Try {

        If(-not(Get-ADComputer -Identity $($InactiveClient.Name))) { }

    }
    Catch {
    
        Write-Host "Removing: $($InactiveClient.Name)"
        Remove-CMDevice -Name $($InactiveClient.Name) -Force
    
    }

}

Multi Domain Environment:

$InactiveClients = Get-CMDevice | Where-Object { $_.ClientActiveStatus -eq 0 -or $_.ClientActiveStatus -eq $null -and $_.Name -notlike "*Unknown Computer*"}

$Domains = (Get-ADForest).Domains

[System.Collections.ArrayList]$Computers = @()


ForEach($InactiveClient in $InactiveClients) {

    ForEach($Domain in $Domains) {

        Try {

             If(-not(Get-ADComputer -Identity $($InactiveClient.Name) -Server $Domain)) { }

 
        }
        Catch {
     
            $Computers += $InactiveClient.Name
     
        }
        

    }
 
}

$ComputersNotInAD = ($Computers | Group-Object | Where-Object { $_.Count -eq $Domains.Count }).Values

Foreach($Computer in $ComputersNotInAD) {

    Write-Host "Removing: $Computer"
    Remove-CMDevice -Name $Computer -Force

}

Automatically update or remove an application in all of your ConfigMgr task sequences

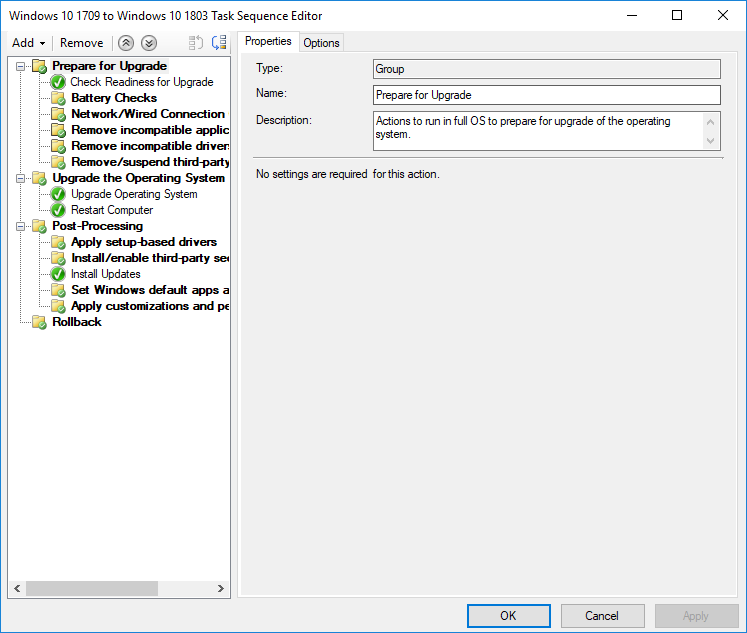
There have been many times where I have needed to retire an old application but I can’t because the application in question is referenced in a few task sequences. Luckily this has become a little easier since ConfigMgr 1906 was released because Microsoft has added the task sequences tab in the application node. Unfortunately you can’t delete the application from the task sequence tab so it is still a tedious task that requires you to open each task sequence and remove or replace the application from each TS. This is why I wrote the following script to automate updating or removing an application from all of the task sequences that references the application.’

Eventually I will create a custom function for this that will make it easier to run but I figured if you are reading this, you are at least somewhat knowledgeable with Powershell 🙂

How to remove an application:

  1. Add the old application name to the $OldApplicationName variable
  2. Make the $Remove variable equal to $True

How to update an application

  1. Add the old application name to the $OldApplicationName variable
  2. Add the new application name to the $NewApplicationName variable
  3. Make the $Remove variable equal to $False

Code:

# Enter the name of the old application that you want to remove or replace
$OldApplicationName = ""

# Enter the new application name that that you want to use to replace the old application
$NewApplicationName = ""

# Make the remove variable value $true if you would like to remove an application from all task sequences
$Remove = ""

cls

$OldApplication = Get-CMApplication "$OldApplicationName"
$NewApplication = Get-CMApplication "$NewApplicationName"

$Application = Get-CMApplication -Name "$OldApplicationName"

# Get all task sequences that have the old application as a reference
$TaskSequences = Get-CMTaskSequence | Where-Object { $_.References.Package -eq $OldApplication.ModelName }

If($TaskSequences) {

    ForEach ($TaskSequence in $TaskSequences) {

        Write-Host "Updating $($TaskSequence.Name)"

        # Get all install application steps
        $InstallApplicationSteps = (Get-CMTSStepInstallApplication -InputObject (Get-CMTaskSequence -Name $TaskSequence.Name)).Name

        ForEach($InstallApplicationStep in $InstallApplicationSteps) {
            
            # Get a list of applications that are in the install application step
            $ApplicationList = (Get-CMTSStepInstallApplication -InputObject $TaskSequence -StepName "$InstallApplicationStep").ApplicationName.Split(",")

            # Get application steps that reference the old application
            If($OldApplication.ModelName -in $ApplicationList) {

                # Try to replace the old application with the new application
                Try {

                    If($Remove -eq $False) {

                        $ModelNames = $ApplicationList.Replace($OldApplication.ModelName,$NewApplication.ModelName)

                    }
                    Else {

                        $ModelNames = $ApplicationList | Where-Object { $_ -ne $OldApplication.ModelName }

                    }

                }
                Catch {

                    Write-Host "Failed to replace or remove old app"
                    Break

                }

                # Add the new application to the application step
                Write-Host "- Updating Step $InstallApplicationStep"
                Set-CMTSStepInstallApplication -InputObject $TaskSequence -StepName "$InstallApplicationStep" -Application ($ModelNames | ForEach { Get-CMApplication -ModelName $_ })

            }

        }

    }

}
Else {

    Write-Host "Could not locate the application in any task sequence!"

}