The following script is intended to run after an in place upgrade (Ex: 1607 to 1703). If you do not know how to run a post script after an upgrade, please refer to my previous post here.
The Powershell script will copy your old wallpapers from C:\Windows.old\windows\Web\Wallpaper\Windows\ and C:\Windows.old\windows\Web\4K\Wallpaper\Windows\ to their appropriate folders. It will also uninstall OneDrive, and prevent OneDriveSetup.exe and Windows Defender from running at logon. As well as remove the Contact Support application, move Office 2016 applications to their appropriate folder in the Start Menu (During my testing, these shortcuts moved around randomly), and attempt to remove any new apps that have reappeared with the upgrade.
Logging is enabled in the script and the entire cleanup log can be located in C:\Logs\1703-Upgrade.log
<#
.FUNCTIONS
1 - Set-FilePermissions
Configures file permissions
2 - Set-FileOwnership
Configures ownership of files
3 - Get-TimeStamp
Configures timestamp for logs
4 - Write-Log
Creates a log for the script
#>
# Configure Functions
Function Set-FilePermissions {
param (
[parameter(Mandatory=$true)]
[ValidateNotNullOrEmpty()]$File,
[parameter(Mandatory=$true)]
[ValidateNotNullOrEmpty()]$User,
[parameter(Mandatory=$true)]
[ValidateNotNullOrEmpty()]$Control,
[parameter(Mandatory=$true)]
[ValidateNotNullOrEmpty()]$Access
)
$ACL = Get-ACL "$File"
Set-Acl -Path "$File" -AclObject $ACL
$Permission = New-Object system.security.accesscontrol.filesystemaccessrule("$User","$Control","$Access")
$Acl.SetAccessRule($Permission)
Set-Acl -Path "$File" -AclObject $ACL
}
Function Set-FileOwnership {
param (
[parameter(Mandatory=$true)]
[ValidateNotNullOrEmpty()]$File,
[parameter(Mandatory=$true)]
[ValidateNotNullOrEmpty()]$User
)
$ACL = Get-ACL "$File"
$Group = New-Object System.Security.Principal.NTAccount("$User")
$ACL.SetOwner($Group)
Set-Acl -Path "$File" -AclObject $ACL
}
function Get-TimeStamp {
return "[{0:MM/dd/yy} {0:HH:mm:ss}]" -f (Get-Date)
}
function Write-Log {
param (
[parameter(Mandatory=$true)]
[ValidateNotNullOrEmpty()]$Passed,
[parameter(Mandatory=$true)]
[ValidateNotNullOrEmpty()]$Failed
)
If ($ProcessError.Count -eq 0) {
Write-Output "$(Get-TimeStamp) $Passed" >> C:\Logs\1703-Upgrade.log
}
Else {
Write-Output "$(Get-TimeStamp) $Failed" >> C:\Logs\1703-Upgrade.log
$Global:Errors++
$ProcessError.Clear()
}
}
<# -- Script begins below -- #>
$Errors = 0
Write-Output "$(Get-TimeStamp) CLEANUP SCRIPT STARTED" > C:\Logs\1703-Upgrade.log
Write-Output " " >> C:\Logs\1703-Upgrade.log
Write-Output "$(Get-TimeStamp) START COPYING WALLPAPERS" >> C:\Logs\1703-Upgrade.log
# Update Wallpaper
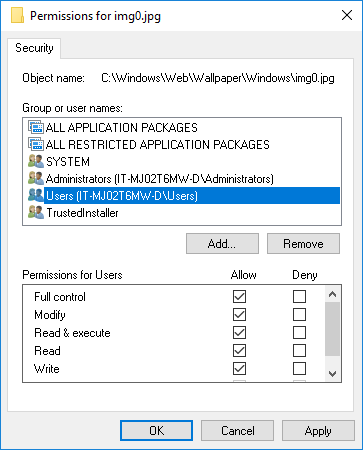
Set-FileOwnership -File "C:\windows\web\Wallpaper\Windows\img0.jpg" -User Users
Set-FilePermissions -File "C:\windows\web\Wallpaper\Windows\img0.jpg" -User Users -Control FullControl -Access Allow
Copy-Item "C:\Windows.old\windows\Web\Wallpaper\Windows\img0.jpg" -Destination "C:\windows\web\Wallpaper\Windows\img0.jpg" -Force -ErrorVariable +ProcessError
Write-Log -Passed "Copied C:\windows\web\Wallpaper\Windows\img0.jpg to C:\windows\web\Wallpaper\Windows\img0.jpg" -Failed "Failed to copy C:\windows\web\Wallpaper\Windows\img0.jpg to C:\windows\web\Wallpaper\Windows\img0.jpg"
# Update 4k Wallpapers
$Wallpapers = Get-ChildItem C:\Windows\Web\4K\Wallpaper\Windows
ForEach($Wallpaper in $Wallpapers) {
Set-FileOwnership -File $Wallpaper.FullName -User Users
Set-FilePermissions -File $Wallpaper.FullName -User Users -Control FullControl -Access Allow
$FileName = $Wallpaper.Name
$FilePath = $Wallpaper.FullName
Copy-Item C:\Windows.old\windows\Web\4K\Wallpaper\Windows\$FileName -Destination $Wallpaper.FullName -Force -ErrorVariable +ProcessError
Write-Log -Passed "Copied C:\Windows.old\windows\Web\4K\Wallpaper\Windows\$FileName to $FilePath" -Failed "Failed to copy C:\Windows.old\windows\Web\4K\Wallpaper\Windows\$FileName to $FilePath"
}
# Uninstall OneDrive
Write-Output " " >> C:\Logs\1703-Upgrade.log
Write-Output "$(Get-TimeStamp) UNINSTALLING ONEDRIVE" >> C:\Logs\1703-Upgrade.log
Start-Process C:\Windows\SysWOW64\OneDriveSetup.exe /uninstall -Wait -ErrorVariable +ProcessError
Write-Log -Passed "Uninstalled OneDrive successfully" -Failed "Failed to uninstall OneDrive"
# Rename OneDriveSetup.exe (This is to prevent OneDrive First Run)
Write-Output " " >> C:\Logs\1703-Upgrade.log
Write-Output "$(Get-TimeStamp) RENAMING ONEDRIVESETUP.EXE TO PREVENT ONEDRIVE FROM RUNNING AT LOGON" >> C:\Logs\1703-Upgrade.log
Set-FileOwnership -File C:\Windows\SysWOW64\OneDriveSetup.exe -User Users
Set-FilePermissions -File C:\Windows\SysWOW64\OneDriveSetup.exe -User Users -Control FullControl -Access Allow
Rename-Item C:\Windows\SysWOW64\OneDriveSetup.exe C:\Windows\SysWOW64\OneDriveSetup.exe.old -ErrorVariable +ProcessError
Write-Log -Passed "Renamed C:\Windows\SysWOW64\OneDriveSetup.exe to C:\Windows\SysWOW64\OneDriveSetup.exe.old" -Failed "Failed to rename C:\Windows\SysWOW64\OneDriveSetup.exe to C:\Windows\SysWOW64\OneDriveSetup.exe.old"
# Remove OneDrive run key
Write-Output " " >> C:\Logs\1703-Upgrade.log
Write-Output "$(Get-TimeStamp) REMOVING ONEDRIVE RUN KEY FROM THE DEFAULT'S NTUSER.DAT FILE" >> C:\Logs\1703-Upgrade.log
cmd /c REG LOAD "HKLM\DEFAULT_USER" "C:\Users\Default\NTUSER.DAT"
Remove-ItemProperty -Path "HKLM:\DEFAULT_USER\SOFTWARE\Microsoft\Windows\CurrentVersion\Run" -Name "OneDriveSetup" -ErrorVariable +ProcessError
Write-Log -Passed "Removed OneDriveSetup from the default profile's run key" -Failed "Failed to remove OneDriveSetup from the default profile's run key"
cmd /c REG UNLOAD "HKLM\DEFAULT_USER"
# Delete run key for Windows Defender
Write-Output " " >> C:\Logs\1703-Upgrade.log
Write-Output "$(Get-TimeStamp) REMOVING WINDOWS DEFENDER FROM THE CURRENT USER RUN KEY" >> C:\Logs\1703-Upgrade.log
Remove-ItemProperty -Path "HKLM:\SOFTWARE\Microsoft\Windows\CurrentVersion\Run" -Name "SecurityHealth" -ErrorVariable +ProcessError
Write-Log -Passed "Removed SecurityHealth from the current user's run key" -Failed "Failed to remove SecurityHealth from the current user's run key"
# Remove Contact Support
Write-Output " " >> C:\Logs\1703-Upgrade.log
Write-Output "$(Get-TimeStamp) REMOVING THE CONTACT SUPPORT APPLICATION" >> C:\Logs\1703-Upgrade.log
Get-WindowsCapability -online | ? {$_.Name -like ‘*ContactSupport*’} | Remove-WindowsCapability –online -ErrorVariable +ProcessError
Write-Log -Passed "Removed the Contact Support application" -Failed "Failed to remove the Contact Support application"
# Move Office 2016 Applications to correct folder in the Start Menu if needed
Write-Output " " >> C:\Logs\1703-Upgrade.log
Write-Output "$(Get-TimeStamp) MOVING OFFICE 2016 APPLICATIONS TO CORRECT FOLDER IN START MENU" >> C:\Logs\1703-Upgrade.log
$OfficePrograms = GCI "C:\ProgramData\Microsoft\Windows\Start Menu\Programs" | Where-Object name -like "*2016.lnk"
If($OfficePrograms.count -gt 0) {
ForEach($Program in $OfficePrograms) {
$OfficeFilePath = $Program.FullName
$OfficeFileName = $Program.Name
Copy-Item "$OfficeFilePath" -Destination "C:\ProgramData\Microsoft\Windows\Start Menu\Programs\Microsoft Office 2016\$OfficeFileName" -Force -ErrorVariable +ProcessError
Remove-Item "$OfficeFilePath"
Write-Log -Passed "Copied $OfficeFilePath to C:\ProgramData\Microsoft\Windows\Start Menu\Programs\Microsoft Office 2016\$OfficeFileName" -Failed "Failed to copy $OfficeFilePath to C:\ProgramData\Microsoft\Windows\Start Menu\Programs\Microsoft Office 2016\$OfficeFileName"
}
}
Else {
Write-Output "$(Get-TimeStamp) Did not find any Office 2016 programs outside of C:\ProgramData\Microsoft\Windows\Start Menu\Programs\Microsoft Office 2016" >> C:\Logs\1703-Upgrade.log
}
# Remove 1703 apps
Write-Output " " >> C:\Logs\1703-Upgrade.log
Write-Output "$(Get-TimeStamp) PREPARING TO REMOVE APPS" >> C:\Logs\1703-Upgrade.log
$AppsList = "Microsoft.WindowsFeedbackHub", "Microsoft.XboxIdentityProvider", "Microsoft.Windows.HolographicFirstRun", "Windows.ContactSupport", "Microsoft.XboxGameCallableUI", "HoloShell", "HoloItemPlayerApp", "HoloCamera", "Microsoft.OneConnect", "Microsoft.People", "Microsoft.XboxSpeechToTextOverlay", "Microsoft.XboxGameOverlay", "Microsoft.SkypeApp", "Microsoft.MicrosoftSolitaireCollection", "Microsoft.MicrosoftOfficeHub", "Microsoft.3DBuilder", "Microsoft.Getstarted", "Microsoft.Microsoft3DViewer", "Microsoft.Office.OneNote", "Microsoft.XboxApp", "Microsoft.ZuneMusic", "Microsoft.ZuneVideo", "Microsoft.MSPaint"
ForEach ($App in $AppsList)
{
$PackageFullName = (Get-AppxPackage $App).PackageFullName
$ProPackageFullName = (Get-AppxProvisionedPackage -online | where {$_.Displayname -eq $App}).PackageName
Write-Host $PackageFullName
Write-Host $ProPackageFullName
If ($PackageFullName)
{
Write-Host “Removing Package: $App”
Remove-AppxPackage -package $PackageFullName -ErrorVariable +ProcessError
Write-Log -Passed "Removed $App" -Failed "Failed to remove $App"
}
else
{
Write-Output "$(Get-TimeStamp) Unable to find package: $App” >> C:\Logs\1703-Upgrade.log
}
if ($ProPackageFullName)
{
Write-Host “Removing Provisioned Package: $ProPackageFullName”
Remove-AppxProvisionedPackage -online -packagename $ProPackageFullName -ErrorVariable +ProcessError
Write-Log -Passed "Removed $ProPackageFullName" -Failed "Failed to remove $ProPackageFullName"
}
else
{
Write-Output "$(Get-TimeStamp) Unable to find provisioned package: $App” >> C:\Logs\1703-Upgrade.log
}
}
$ErrorCount = $Errors
Write-Output " " >> C:\Logs\1703-Upgrade.log
Write-Output "$(Get-TimeStamp) CLEANUP COMPLETE - FOUND $ErrorCount ERRORS" >> C:\Logs\1703-Upgrade.log