Powershell

Automatically remove inactive devices that do not exist in AD

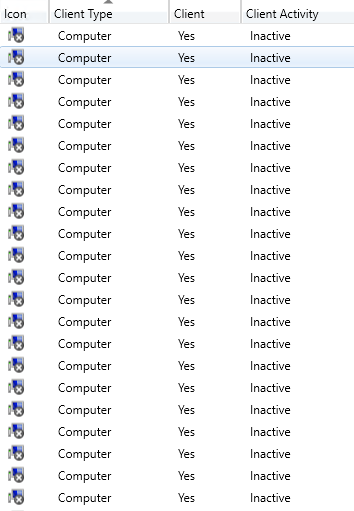
The following script will query Configmgr for inactive devices and automatically remove them if they are no longer in Active Directory. Personally I prefer this simple script over the built in Configmgr maintenance task (Delete Inactive Client Discovery Data) because the task does not check Active Directory and it will remove any inactive device with the criteria that you have configured. By default, this maintenance task will remove any device that has been inactive for 90 days. At least in my environment, if a computer does not exist in Active Directory it should not be in MEMCM so I have the script run on a daily basis as a scheduled task to remove the devices that are not in AD.

Keep in mind to not run this script if you have workgroup computers because they will be deleted since they are not in AD.

Powershell Scripts:

Single Domain Environment:

$InactiveClients = Get-CMDevice | Where-Object { $_.ClientActiveStatus -eq 0 -or $_.ClientActiveStatus -eq $null -and $_.Name -notlike "*Unknown Computer*"}

ForEach($InactiveClient in $InactiveClients) {
    
    Try {

        If(-not(Get-ADComputer -Identity $($InactiveClient.Name))) { }

    }
    Catch {
    
        Write-Host "Removing: $($InactiveClient.Name)"
        Remove-CMDevice -Name $($InactiveClient.Name) -Force
    
    }

}

Multi Domain Environment:

$InactiveClients = Get-CMDevice | Where-Object { $_.ClientActiveStatus -eq 0 -or $_.ClientActiveStatus -eq $null -and $_.Name -notlike "*Unknown Computer*"}

$Domains = (Get-ADForest).Domains

[System.Collections.ArrayList]$Computers = @()


ForEach($InactiveClient in $InactiveClients) {

    ForEach($Domain in $Domains) {

        Try {

             If(-not(Get-ADComputer -Identity $($InactiveClient.Name) -Server $Domain)) { }

 
        }
        Catch {
     
            $Computers += $InactiveClient.Name
     
        }
        

    }
 
}

$ComputersNotInAD = ($Computers | Group-Object | Where-Object { $_.Count -eq $Domains.Count }).Values

Foreach($Computer in $ComputersNotInAD) {

    Write-Host "Removing: $Computer"
    Remove-CMDevice -Name $Computer -Force

}

Automatically update or remove an application in all of your ConfigMgr task sequences

There have been many times where I have needed to retire an old application but I can’t because the application in question is referenced in a few task sequences. Luckily this has become a little easier since ConfigMgr 1906 was released because Microsoft has added the task sequences tab in the application node. Unfortunately you can’t delete the application from the task sequence tab so it is still a tedious task that requires you to open each task sequence and remove or replace the application from each TS. This is why I wrote the following script to automate updating or removing an application from all of the task sequences that references the application.’

Eventually I will create a custom function for this that will make it easier to run but I figured if you are reading this, you are at least somewhat knowledgeable with Powershell 🙂

How to remove an application:

  1. Add the old application name to the $OldApplicationName variable
  2. Make the $Remove variable equal to $True

How to update an application

  1. Add the old application name to the $OldApplicationName variable
  2. Add the new application name to the $NewApplicationName variable
  3. Make the $Remove variable equal to $False

Code:

# Enter the name of the old application that you want to remove or replace
$OldApplicationName = ""

# Enter the new application name that that you want to use to replace the old application
$NewApplicationName = ""

# Make the remove variable value $true if you would like to remove an application from all task sequences
$Remove = ""

cls

$OldApplication = Get-CMApplication "$OldApplicationName"
$NewApplication = Get-CMApplication "$NewApplicationName"

$Application = Get-CMApplication -Name "$OldApplicationName"

# Get all task sequences that have the old application as a reference
$TaskSequences = Get-CMTaskSequence | Where-Object { $_.References.Package -eq $OldApplication.ModelName }

If($TaskSequences) {

    ForEach ($TaskSequence in $TaskSequences) {

        Write-Host "Updating $($TaskSequence.Name)"

        # Get all install application steps
        $InstallApplicationSteps = (Get-CMTSStepInstallApplication -InputObject (Get-CMTaskSequence -Name $TaskSequence.Name)).Name

        ForEach($InstallApplicationStep in $InstallApplicationSteps) {
            
            # Get a list of applications that are in the install application step
            $ApplicationList = (Get-CMTSStepInstallApplication -InputObject $TaskSequence -StepName "$InstallApplicationStep").ApplicationName.Split(",")

            # Get application steps that reference the old application
            If($OldApplication.ModelName -in $ApplicationList) {

                # Try to replace the old application with the new application
                Try {

                    If($Remove -eq $False) {

                        $ModelNames = $ApplicationList.Replace($OldApplication.ModelName,$NewApplication.ModelName)

                    }
                    Else {

                        $ModelNames = $ApplicationList | Where-Object { $_ -ne $OldApplication.ModelName }

                    }

                }
                Catch {

                    Write-Host "Failed to replace or remove old app"
                    Break

                }

                # Add the new application to the application step
                Write-Host "- Updating Step $InstallApplicationStep"
                Set-CMTSStepInstallApplication -InputObject $TaskSequence -StepName "$InstallApplicationStep" -Application ($ModelNames | ForEach { Get-CMApplication -ModelName $_ })

            }

        }

    }

}
Else {

    Write-Host "Could not locate the application in any task sequence!"

}

Automatically create Microsoft Edge profile shortcuts

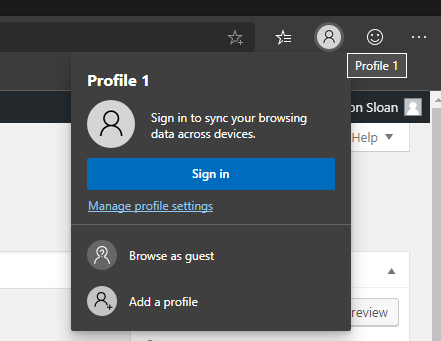
Recently Adam Gross from A Square Dozen wrote a blog post on how to pin Microsoft Edge profile shortcuts to the taskbar and that got me thinking into how I could do this automatically. Unfortunately I couldn’t find a way to pin to the taskbar without a third party tool so I came up with the following solution that will create shortcuts for each of your profiles automatically on the desktop instead. The script will scan through %LOCALAPPDATA%\Microsoft\Edge\UserData and locate any custom profiles that you may have created (Example: %LOCALAPPDATA%\Microsoft\Edge\UserData\Profile 1). It will then query each profile’s preference file and locate the name of the profile so it can be used for the shortcut name (Example: Edge – Jose). At the end of the script, it will also create a shortcut for your default profile.

Keep in mind this script will only work with the regular Edge channel and not the DEV,Beta or Canary channel since the “C:\Program Files (x86)\Microsoft\Edge\Application\msedge.exe” is hard coded in the script. Hopefully this will help someone and if there is a way to pin to the taskbar by just using Powershell, please let me know!

$EdgeProfiles = Get-ChildItem "$env:LOCALAPPDATA\Microsoft\Edge\User Data" | Where-Object { $_.Name -like "Profile *"}

ForEach($EdgeProfile in $EdgeProfiles.Name) {

    # Get Profile Name
    $Preferences = "$env:LOCALAPPDATA\Microsoft\Edge\User Data\$EdgeProfile\Preferences"
    $Data = (ConvertFrom-Json (Get-content $Preferences -Raw))
    $ProfileName = $Data.Profile.Name

    # Create Shortcut on Desktop
    $TargetPath =  "C:\Program Files (x86)\Microsoft\Edge\Application\msedge.exe"
    $ShortcutFile = "$env:USERPROFILE\Desktop\Edge - $ProfileName.lnk"
    $WScriptShell = New-Object -ComObject WScript.Shell
    $Shortcut = $WScriptShell.CreateShortcut($ShortcutFile)
    $Shortcut.IconLocation = "$env:LOCALAPPDATA\Microsoft\Edge\User Data\$EdgeProfile\Edge Profile.ico, 0"
    $Shortcut.Arguments =  "--profile-directory=""$EdgeProfile"""
    $Shortcut.TargetPath = $TargetPath
    $Shortcut.Save()

}

# Get Profile Name
$Preferences = "$env:LOCALAPPDATA\Microsoft\Edge\User Data\Default\Preferences"
$Data = (ConvertFrom-Json (Get-content $Preferences -Raw))
$ProfileName = $Data.Profile.Name

If($ProfileName -eq "Person 1") {

    $ProfileName = "Default"

}

# Create Shortcut on Desktop
$TargetPath =  "C:\Program Files (x86)\Microsoft\Edge\Application\msedge.exe"
$ShortcutFile = "$env:USERPROFILE\Desktop\Edge - $ProfileName.lnk"
$WScriptShell = New-Object -ComObject WScript.Shell
$Shortcut = $WScriptShell.CreateShortcut($ShortcutFile)
$Shortcut.IconLocation = "$env:LOCALAPPDATA\Microsoft\Edge\User Data\Default\Edge Profile.ico, 0"
$Shortcut.Arguments =  "--profile-directory=""Default"""
$Shortcut.TargetPath = $TargetPath
$Shortcut.Save()

Get-CMGStatus Function

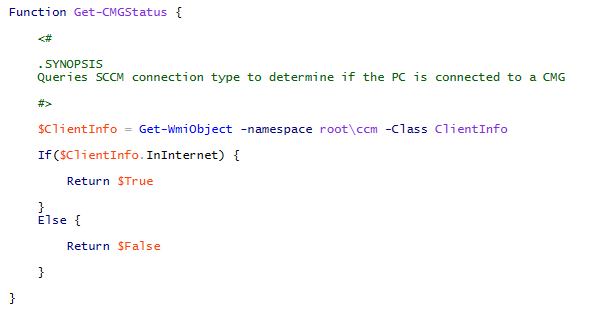
This small Powershell function can be used to determine if an SCCM client is connected to the Internet or Intranet. It is useful when you have a job that requires some type of network resource and it cannot run while your client is connected to a cloud management gateway. Using this example, you can easily determine the connection with the function and then decide to exit the script and run it at a later time.

Function Get-CMGStatus {

    <#
  
    .SYNOPSIS
    Queries SCCM connection type to determine if the PC is connected to a CMG
  
    #>

    $ClientInfo = Get-WmiObject -namespace root\ccm -Class ClientInfo

    If($ClientInfo.InInternet) {

        Return $True

    }
    Else {
        
        Return $False

    }

}

Install-Font Function

Use the Install-Font function to install system fonts on Windows 10 1809 and above. Older scripts may not work with Windows 10 1809 and above since Windows will now try to install fonts in the user’s LOCALAPPDATA directory. This function will get around those issues and allow you to programmatically install fonts for all users again.

How to use the function:

Install Fonts from folder
Install-Font “C:\Temp\Helvetica Neue”

Install one font
Install-Font “C:\Temp\Helvetica Neue\HelveticaNeueLTStd-HvIt.otf”


Function Install-Font {

    <#  
 
    .SYNOPSIS Install system fonts for all users
 
    .PARAMETER FontPath Provide path to a font or a folder containing fonts

    .PARAMETER Recurse Scan subdirectories
 
    .EXAMPLE - Install Fonts from folder
    Install-Font "C:\Temp\Helvetica Neue"
 
    .EXAMPLE - Install one font 
    Install-Font "C:\Temp\Helvetica Neue\HelveticaNeueLTStd-HvIt.otf"
 
    #>

    [CmdletBinding()]
    Param(
        [Parameter(Mandatory=$true)]
        [String]$FontPath,
        [Switch]$Recurse
    )

    If(Test-Path $FontPath) {
        
        $FontFile = Get-Item -Path $FontPath

        If($FontFile -is [System.IO.DirectoryInfo]) {

            If($Recurse) {

                $Fonts = Get-ChildItem -Path $FontFile -Include ('*.fon','*.otf','*.ttc','*.ttf') -Recurse

            }
            Else {

                $Fonts = Get-ChildItem -Path "$FontFile\*" -Include ('*.fon','*.otf','*.ttc','*.ttf')

            }
            If(!$Fonts) {

                Throw ("Unable to find any fonts in the folder")

            }

        }
        ElseIf($FontFile -is [IO.FileInfo]) {

            If ($FontFile.Extension -notin ('.fon','.otf','.ttc','.ttf')) {

                Throw ("The file provided does not appear to be a valid font")

            }

            $Fonts = $FontFile

        }
        Else {
        
            Throw ("Expected font or folder")
        
        }

    }
    Else {

        Throw [System.IO.FileNotFoundException]::New("Could not find path: $FontPath")

    }
    ForEach ($Font in $Fonts) {

        $FontName = $Font.Basename
        Write-Host "Installing font: $FontName"
        Copy-Item $Font "C:\Windows\Fonts" -Force
        New-ItemProperty -Name $FontName -Path "HKLM:\Software\Microsoft\Windows NT\CurrentVersion\Fonts" -PropertyType String -Value $Font.Name -Force | Out-Null

    }

}

Change your Office 365 ProPlus Update Channel using SCCM

Office 365 ProPlus has four different update channels:

  • Monthly Channel (Targeted)
  • Monthly Channel
  • Semi-annual Channel (Targeted)
  • Semi-annual Channel

In order to switch your client to different channels, you must change the CDNBaseUrl and UpdateChannel registry keys in HKEY_LOCAL_MACHINE\SOFTWARE\Microsoft\Office\ClickToRun\Configuration. In the Set-Office365Channel function we will be using C:\Program Files\Common Files\Microsoft Shared\ClickToRun\OfficeC2RClient.exe to update the CDNBaseUrl key and we will be automatically setting the UpdateChannel key. We are updating the UpdateChannel key because in my testing, SCCM would not deploy the new update channel patches if you did not set this key. After these two tasks are complete, the function will run a hardware inventory scan so SCCM can update the channel in the console.

How to use Set-Office365Channel:

  • Switch to Monthly Channel (Targeted)
    Set-Office365Channel -UpdateChannel Insiders
  • Switch to Monthly Channel
    Set-Office365Channel -UpdateChannel Monthly
  • Switch to Semi-annual Channel (Targeted)
    Set-Office365Channel -UpdateChannel Targeted
  • Switch to Semi-annual Channel
    Set-Office365Channel -UpdateChannel Broad
Function Set-Office365Channel {

    <#  

    .SYNOPSIS Change Office 365 Update Channel 

    .PARAMETER UpdateChannel Provide update channel that you would like to use 

    .EXAMPLE - Switch to Monthly Channel (Targeted) 
    Set-Office365Channel -UpdateChannel Insiders

    .EXAMPLE - Switch to Monthly Channel 
    Set-Office365Channel -UpdateChannel Monthly

    .EXAMPLE - Semi-annual Channel (Targeted) 
    Set-Office365Channel -UpdateChannel Targeted

    .EXAMPLE - Semi-annual Channel 
    Set-Office365Channel -UpdateChannel Broad

    #>

    param (
        # Provide update channel that you would like to use
        [parameter(Mandatory=$True)]
        [ValidateSet('Insiders', 'Monthly', 'Targeted', 'Broad')]
        [string]$UpdateChannel
    )

    $Channel = Switch ($UpdateChannel) {

        "Insiders" {"http://officecdn.microsoft.com/pr/64256afe-f5d9-4f86-8936-8840a6a4f5be"}
        "Monthly" {"http://officecdn.microsoft.com/pr/492350f6-3a01-4f97-b9c0-c7c6ddf67d60"}
        "Targeted" {"http://officecdn.microsoft.com/pr/b8f9b850-328d-4355-9145-c59439a0c4cf"}
        "Broad" {"http://officecdn.microsoft.com/pr/7ffbc6bf-bc32-4f92-8982-f9dd17fd3114"}

    }

    $Configuration = "HKLM:\SOFTWARE\Microsoft\Office\ClickToRun\Configuration"

    If((Get-ItemProperty $Configuration).CDNBaseUrl -ne "$Channel") {

        # Update Channel
        Start-Process "C:\Program Files\Common Files\Microsoft Shared\ClickToRun\OfficeC2RClient.exe" -ArgumentList "/changesetting Channel=$UpdateChannel"
        Set-ItemProperty "HKLM:\SOFTWARE\Microsoft\Office\ClickToRun\Configuration" -Name UpdateChannel -Value "$Channel" -Force

        # Trigger Hardware Inventory
        Invoke-WmiMethod -Namespace "root\ccm" -Class "SMS_Client" -Name "TriggerSchedule" -ArgumentList "{00000000-0000-0000-0000-000000000001}"

    }

}

How to reset your start menu layout in Windows 10 1809

Well Microsoft has changed things again since my last post that showed you how to reset the start layout in Windows 10 1709. Now with 1809 there is a new key name and it does look to be slightly random so I am now having to use a wildcard. I’m currently only testing every other build so please keep me updated if this breaks with a spring feature upgrade release.

Remove-Item 'HKCU:\Software\Microsoft\Windows\CurrentVersion\CloudStore\Store\Cache\DefaultAccount\*$start.tilegrid$windows.data.curatedtilecollection.tilecollection'  -Force -Recurse
Get-Process Explorer | Stop-Process
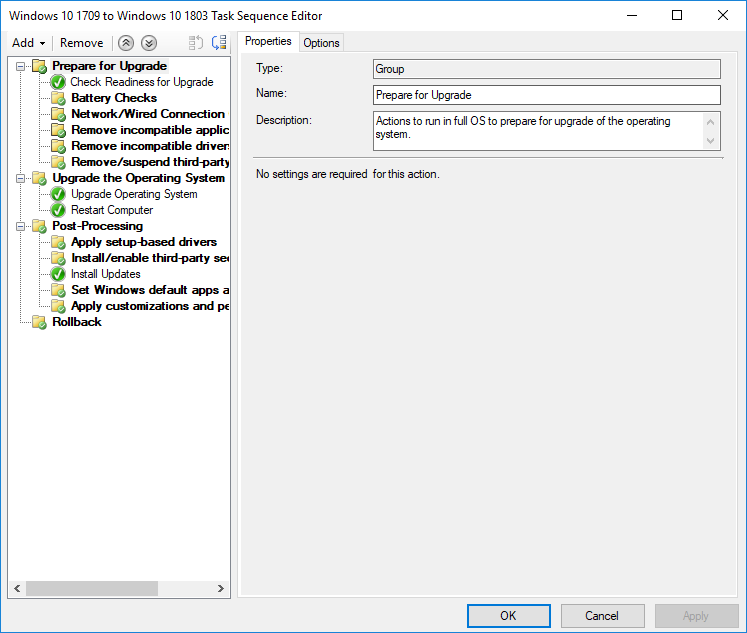
Are you trying to reset the start layout for Windows 10 1709? Click here to find out how.

SCCM script to identify systems vulnerable to ADV180028

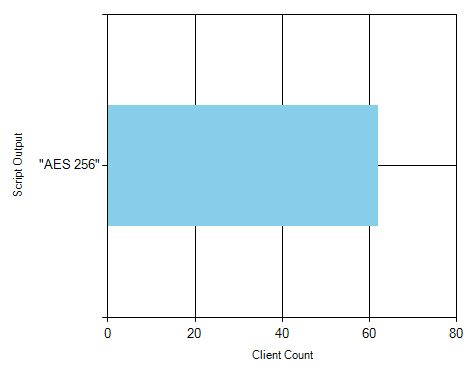
You can run the following script against an SCCM collection to identify a system’s Bitlocker encryption method. This will help you find any computers that may be vulnerable to ADV180028.

Note: Your system may be vulnerable if your encryption method is set to Hardware Encryption!

$EncryptionMethod = manage-bde -status C: | Where-Object {$_ -match "Encryption Method"}

If ($EncryptionMethod -ne $Null) {

    $EncryptionMethod = $EncryptionMethod.Split(":")[1].trim()

}
Else {

    $EncryptionMethod = "Encryption Method not found"

}

$EncryptionMethod

Learn more about ADV180028 here.
Learn how to deploy scripts in SCCM here.

Get-LoggedOnUser Function

Use the Get-LoggedOnUser function to find out who is the current logged on user on a local or remote machine. The function can be useful for SCCM deployments or just trying to find out who is logged on a remote computer.

Examples:
Find out who is logged on to a remote machine:
Get-LoggedOnUser -ComputerName COMPUTERNAME-D
Find out the current local logged on user:
Get-LoggedOnUser

Source Code:

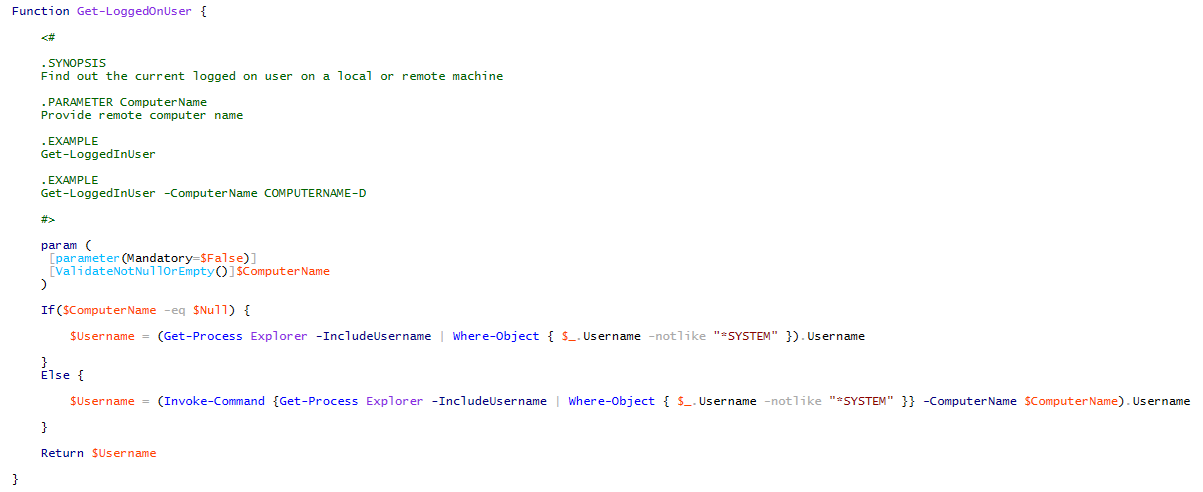
Function Get-LoggedOnUser {

    <#
 
    .SYNOPSIS
    Find out the current logged on user on a local or remote machine
   
    .PARAMETER ComputerName
    Provide remote computer name
   
    .EXAMPLE
    Get-LoggedOnUser
   
    .EXAMPLE
    Get-LoggedOnUser -ComputerName COMPUTERNAME-D
 
    #>

    param (
     [parameter(Mandatory=$False)]
     [ValidateNotNullOrEmpty()]$ComputerName
    )
    
    If($ComputerName -eq $Null) {

        $Username = (Get-Process Explorer -IncludeUsername | Where-Object { $_.Username -notlike "*SYSTEM" }).Username

    }
    Else {

        $Username = (Invoke-Command {Get-Process Explorer -IncludeUsername | Where-Object { $_.Username -notlike "*SYSTEM" }} -ComputerName $ComputerName).Username

    }

    Return $Username

}

Validate-GroupMembership Powershell Function

Use the Validate-GroupMembership function to confirm whether or not a user or computer object is a member of an AD group.

Examples:
Find out if the current user is a member of an AD group called “Test Group”
Validate-GroupMembership -SearchString $env:USERNAME -SearchType User -Group “Test Group”

Find out if the current computer is a member of an AD group called “ORL Computers”
Validate-GroupMembership -SearchString $env:COMPUTERNAME -SearchType Computer -Group “ORL Computers”

Function Validate-GroupMembership {

    <#

    .SYNOPSIS
    Validates AD group membership for a user or computer object
  
    .PARAMETER SearchString
    Provide Username or Computer Name
  
    .PARAMETER SearchType
    Specify type (User or Computer)

    .PARAMETER Group
    Provide AD Group name
  
    .EXAMPLE
    Validate-GroupMembership -SearchString $env:USERNAME -SearchType User -Group "Test Group"
  
    .EXAMPLE
    Validate-GroupMembership -SearchString $env:COMPUTERNAME -SearchType Computer -Group "ORL Computers"

    #>

    param (
     [parameter(Mandatory=$True)]
     [ValidateNotNullOrEmpty()]$SearchString,
     [parameter(Mandatory=$True)]
     [ValidateSet("User", "Computer")]
     [ValidateNotNullOrEmpty()]$SearchType,
     [parameter(Mandatory=$true)]
     [ValidateNotNullOrEmpty()]$Group
    )

    Try {

        $objSearcher = New-Object System.DirectoryServices.DirectorySearcher
        $objSearcher.SearchRoot = New-Object System.DirectoryServices.DirectoryEntry

        If ($SearchType -eq "User") {

            $objSearcher.Filter = "(&(objectCategory=User)(SAMAccountName=$SearchString))"

        } 
        Else {

            $objSearcher.Filter = "(&(objectCategory=Computer)(cn=$SearchString))"

        }

        $objSearcher.SearchScope = "Subtree"
        $obj = $objSearcher.FindOne()
        $User = $obj.Properties["distinguishedname"]

        $objSearcher.PageSize=1000
        $objSearcher.Filter = "(&(objectClass=group)(cn=$Group))"
        $obj = $objSearcher.FindOne()

        [String[]]$Members = $obj.Properties["member"]

        If($Members.count -eq 0) {                       

            $retrievedAllMembers=$false           
            $rangeBottom =0
            $rangeTop= 0

            While (! $retrievedAllMembers) {

                $rangeTop=$rangeBottom + 1499               

                $memberRange="member;range=$rangeBottom-$rangeTop"  

                $objSearcher.PropertiesToLoad.Clear()
                [void]$objSearcher.PropertiesToLoad.Add("$memberRange")

                $rangeBottom+=1500

                Try {

                    $obj = $objSearcher.FindOne() 
                    $rangedProperty = $obj.Properties.PropertyNames -like "member;range=*"
                    $Members +=$obj.Properties.item($rangedProperty)          
                   
                        if ($Members.count -eq 0) { $retrievedAllMembers=$true }
                }

                Catch {

                    $retrievedAllMembers=$true
                }

            }
            
        }

    }

    Catch {

        Write-Host "Either group or user does not exist"
        Return $False

    }
   
    If ($Members -contains $User) { 

        Return $True

    }
    Else {

        Return $False

    }

}