How to install Office 365 ProPlus updates during your SCCM build and capture task sequence

Have you tried to install Office 365 ProPlus updates during your SCCM build and capture task sequence and it never installed? Well that is most likely due to a registry key that was not updated. The update channel registry key value in HKEY_LOCAL_MACHINE\SOFTWARE\Microsoft\Office\ClickToRun\Configuration should not be pointing to your ccmcache folder. If it is, then this fix will work for you.

In order to update this key, you should run the following command before the Install Updates step in your task sequence.:
“C:\Program Files\Common Files\Microsoft Shared\ClickToRun\OfficeC2RClient.exe” /update SCHEDULEDTASK displaylevel=False

Note: This command must run before you attempt to install any Office 365 ProPlus software updates in your task sequence. If it does not then your update channel value will still be pointing to the ccmcache which will stop the updates from running.

Find more information here:
https://docs.microsoft.com/en-us/sccm/sum/deploy-use/manage-office-365-proplus-updates#updating-office-365-during-task-sequences-when-office-365-is-installed-in-the-base-image

SCCM script to identify systems vulnerable to ADV180028

You can run the following script against an SCCM collection to identify a system’s Bitlocker encryption method. This will help you find any computers that may be vulnerable to ADV180028.

Note: Your system may be vulnerable if your encryption method is set to Hardware Encryption!

$EncryptionMethod = manage-bde -status C: | Where-Object {$_ -match "Encryption Method"}

If ($EncryptionMethod -ne $Null) {

    $EncryptionMethod = $EncryptionMethod.Split(":")[1].trim()

}
Else {

    $EncryptionMethod = "Encryption Method not found"

}

$EncryptionMethod

Learn more about ADV180028 here.
Learn how to deploy scripts in SCCM here.

Get-LoggedOnUser Function

Use the Get-LoggedOnUser function to find out who is the current logged on user on a local or remote machine. The function can be useful for SCCM deployments or just trying to find out who is logged on a remote computer.

Examples:
Find out who is logged on to a remote machine:
Get-LoggedOnUser -ComputerName COMPUTERNAME-D
Find out the current local logged on user:
Get-LoggedOnUser

Source Code:

Function Get-LoggedOnUser {

    <#
 
    .SYNOPSIS
    Find out the current logged on user on a local or remote machine
   
    .PARAMETER ComputerName
    Provide remote computer name
   
    .EXAMPLE
    Get-LoggedOnUser
   
    .EXAMPLE
    Get-LoggedOnUser -ComputerName COMPUTERNAME-D
 
    #>

    param (
     [parameter(Mandatory=$False)]
     [ValidateNotNullOrEmpty()]$ComputerName
    )
    
    If($ComputerName -eq $Null) {

        $Username = (Get-Process Explorer -IncludeUsername | Where-Object { $_.Username -notlike "*SYSTEM" }).Username

    }
    Else {

        $Username = (Invoke-Command {Get-Process Explorer -IncludeUsername | Where-Object { $_.Username -notlike "*SYSTEM" }} -ComputerName $ComputerName).Username

    }

    Return $Username

}

How to disable Microsoft Teams from running at logon

If you landed on this page you are probablly working on packaging Microsoft Teams and have been banging your head against a desk trying to figure out how to disable it from loading at startup. Fortunately for you, I figured out a solution that works 100% of the time.

What do you need?
Node.JS
Microsoft Teams
Notepad++

Where to download?
Node.JS – https://nodejs.org/en/
Microsoft Teams – https://teams.microsoft.com/downloads
Notepad++ – https://notepad-plus-plus.org/

Brief background
Essentially, Microsoft Teams is a webpage in the background. It was developed with Electron which is a framework that lets developers create cross-platform desktop apps with web front-end technologies. Some other popular applications such as Skype, and Visual Studio Code were also built with using this technology.

With Electron apps, most of the source files for the application will be packaged into a file named app.asar. You can open the file in Notepad but you cannot save it since it is a READONLY file. From my experience, any changes made to it via Notepad will crash the app and prevent it from loading.

How do you do it?

  1. Download and install Microsoft Teams
  2. Download and install Node.JS
  3. Open the CMD prompt as an Administrator
  4. Run: npm install -g asar
  5. Run: asar extract "%LOCALAPPDATA%\Microsoft\Teams\current\resources\app.asar" C:\Temp\asar
    Note – Try running “C:\ProgramData\Microsoft\Windows\Start Menu\Programs\Node.js\Node.js command prompt.lnk” if the command prompt does not recognize the ASAR command.
  6. Navigate to C:\Temp\asar\lib
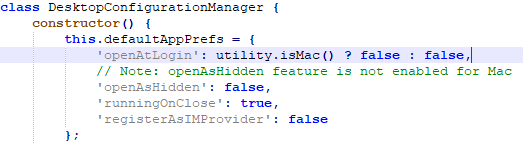
  7. Locate desktopConfigurationManager.js and open the file with Notepad++
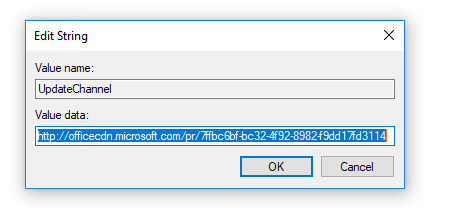
  8. Search for OPENATLOGIN (There should be two references) and set the value to FALSE as shown below in the screenshots:
    disable teams at startup
    disable teams at startupli>

    Last but not least, it is time to repackage everything!

  9. Run: asar pack "C:\TEMP\asar" "C:\TEMP\app.asar" --unpack *.node

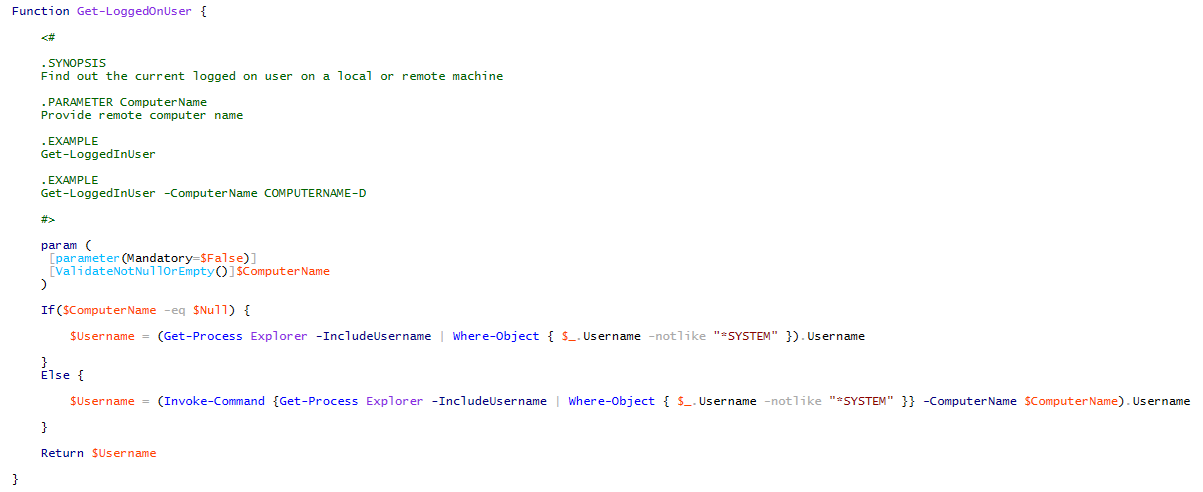
Now that you have a customized app.asar, you can silently install Teams and also not worry about it launching at startup. See the install script below for an example:

# Install Microsoft Teams
Start-Process "$PSScriptRoot\Teams_windows_x64.exe" -ArgumentList "-s" -Wait

# Copy customized app.asar
Copy "$PSScriptRoot\app.asar" "$env:LOCALAPPDATA\Microsoft\Teams\current\resources\app.asar" -Force

Validate-GroupMembership Powershell Function

Use the Validate-GroupMembership function to confirm whether or not a user or computer object is a member of an AD group.

Examples:
Find out if the current user is a member of an AD group called “Test Group”
Validate-GroupMembership -SearchString $env:USERNAME -SearchType User -Group “Test Group”

Find out if the current computer is a member of an AD group called “ORL Computers”
Validate-GroupMembership -SearchString $env:COMPUTERNAME -SearchType Computer -Group “ORL Computers”

Function Validate-GroupMembership {

    <#

    .SYNOPSIS
    Validates AD group membership for a user or computer object
  
    .PARAMETER SearchString
    Provide Username or Computer Name
  
    .PARAMETER SearchType
    Specify type (User or Computer)

    .PARAMETER Group
    Provide AD Group name
  
    .EXAMPLE
    Validate-GroupMembership -SearchString $env:USERNAME -SearchType User -Group "Test Group"
  
    .EXAMPLE
    Validate-GroupMembership -SearchString $env:COMPUTERNAME -SearchType Computer -Group "ORL Computers"

    #>

    param (
     [parameter(Mandatory=$True)]
     [ValidateNotNullOrEmpty()]$SearchString,
     [parameter(Mandatory=$True)]
     [ValidateSet("User", "Computer")]
     [ValidateNotNullOrEmpty()]$SearchType,
     [parameter(Mandatory=$true)]
     [ValidateNotNullOrEmpty()]$Group
    )

    Try {

        $objSearcher = New-Object System.DirectoryServices.DirectorySearcher
        $objSearcher.SearchRoot = New-Object System.DirectoryServices.DirectoryEntry

        If ($SearchType -eq "User") {

            $objSearcher.Filter = "(&(objectCategory=User)(SAMAccountName=$SearchString))"

        } 
        Else {

            $objSearcher.Filter = "(&(objectCategory=Computer)(cn=$SearchString))"

        }

        $objSearcher.SearchScope = "Subtree"
        $obj = $objSearcher.FindOne()
        $User = $obj.Properties["distinguishedname"]

        $objSearcher.PageSize=1000
        $objSearcher.Filter = "(&(objectClass=group)(cn=$Group))"
        $obj = $objSearcher.FindOne()

        [String[]]$Members = $obj.Properties["member"]

        If($Members.count -eq 0) {                       

            $retrievedAllMembers=$false           
            $rangeBottom =0
            $rangeTop= 0

            While (! $retrievedAllMembers) {

                $rangeTop=$rangeBottom + 1499               

                $memberRange="member;range=$rangeBottom-$rangeTop"  

                $objSearcher.PropertiesToLoad.Clear()
                [void]$objSearcher.PropertiesToLoad.Add("$memberRange")

                $rangeBottom+=1500

                Try {

                    $obj = $objSearcher.FindOne() 
                    $rangedProperty = $obj.Properties.PropertyNames -like "member;range=*"
                    $Members +=$obj.Properties.item($rangedProperty)          
                   
                        if ($Members.count -eq 0) { $retrievedAllMembers=$true }
                }

                Catch {

                    $retrievedAllMembers=$true
                }

            }
            
        }

    }

    Catch {

        Write-Host "Either group or user does not exist"
        Return $False

    }
   
    If ($Members -contains $User) { 

        Return $True

    }
    Else {

        Return $False

    }

}

Add a new custom Powershell module path

You can use the following script to add a new module path to the PSModulePath environmental variable. Adding modules to this path will allow you to use them in your own scripts and if you have Powershell 3.0+ these modules will be automatically loaded when you call one of the custom CMDLET’s.

Notes:
Please replace the $ModulePath variable with the path that you would like to use.

$ModulePath = "YOUR PATH HERE"
$Path = (Get-ItemProperty -Path "HKLM:\SYSTEM\ControlSet001\Control\Session Manager\Environment").PSModulePath
$NewPath = "$ModulePath" + ";" + $Path

If($Path -notlike "*$ModulePath*") {
    Set-ItemProperty -Path "HKLM:\SYSTEM\ControlSet001\Control\Session Manager\Environment" -Name PSModulePath -Type String -Value "$NewPath"
}

AC Power Check For Laptops

The following script can be used in an SCCM or MDT upgrade task sequence to check if a laptop is connected to a charger. If the script detects that the laptop is not connected to a charger, it will prompt the user to connect the laptop to AC power.

$ChassisTypes = (Get-WmiObject -Class Win32_SystemEnclosure).ChassisTypes

Switch($ChassisTypes) {

    3 { $Chassis = "Desktop" }
    4 { $Chassis = "Desktop" }
    5 { $Chassis = "Desktop" }
    6 { $Chassis = "Desktop" }
    7 { $Chassis = "Desktop" }
    8 { $Chassis = "Laptop" }
    9 { $Chassis = "Laptop" }
    10 { $Chassis = "Laptop" }
    11 { $Chassis = "Laptop" }
    12 { $Chassis = "Laptop" }
    14 { $Chassis = "Laptop" }
    15 { $Chassis = "Desktop" }
    16 { $Chassis = "Desktop" }
    18 { $Chassis = "Laptop" }
    21 { $Chassis = "Laptop" }
    23 { $Chassis = "Server" }
    31 { $Chassis = "Laptop" }

}
If($Chassis -eq "Laptop") {

    Do {
      $PowerStatus = (Get-WmiObject -Class BatteryStatus  -Namespace root\wmi -ErrorAction SilentlyContinue).PowerOnLine

        If($PowerStatus -ne $True) {

            $TSEnv = New-Object -ComObject "Microsoft.SMS.TsProgressUI"
            $TSEnv.CloseProgressDialog()
            $wshell = New-Object -ComObject Wscript.Shell
            $wshell.Popup("Please Connect AC Power - Click OK to Continue",0,"AC Power Check",0)
    
        }
    }
    Until($PowerStatus -eq $True)

}

Silently launch scripts or applications with Hidden.vbs

Do you ever need to launch a process silently? Well you can easily accomplish this task by using Hidden.vbs! You no longer need to hardcode any process related info in your script because you can provide the path in the arguments.

Examples:
Hidden.vbs Powershell.exe -ExecutionPolicy Unrestricted -File C:\IT\PowerShell\PDF_Fix.ps1
Hidden.vbs Install.bat


Download The Script Now!

' //***************************************************************************
' // ***** Script Header *****
' // =======================================================
' // Silently launch a process
' // =======================================================
' //
' // File:      Hidden.vbs
' //
' // Purpose:   To provide a method of launching applications silently
' //
' //
' // ***** End Header *****
' //***************************************************************************

Set objShell = CreateObject("Shell.Application")
Set objWshShell = WScript.CreateObject("WScript.Shell")
Set objArgs = Wscript.Arguments

If (WScript.Arguments.Count >= 1) Then
    strFlag = WScript.Arguments(0)
    If (strFlag = "") OR (strFlag="help") OR (strFlag="/h") OR (strFlag="\h") OR (strFlag="-h") _
        OR (strFlag = "\?") OR (strFlag = "/?") OR (strFlag = "-?") OR (strFlag="h") _
        OR (strFlag = "?") Then
		DisplayUsage
        WScript.Quit
    Else
	ReDim args(WScript.Arguments.Count-1)
	For i = 0 To WScript.Arguments.Count-1
	  If InStr(WScript.Arguments(i), " ") > 0 Then
		args(i) = Chr(34) & WScript.Arguments(i) & Chr(34)
	  Else
		args(i) = WScript.Arguments(i)
	  End If
	Next

	objWshShell.Run Join(args, " "),0	
    End If
Else
    DisplayUsage
    WScript.Quit
End If

Sub DisplayUsage

    WScript.Echo "Silently launch a process" & vbCrLf & _
                 "" & vbCrLf & _
                 "Purpose:" & vbCrLf & _
                 "------------" & vbCrLf & _
                 "To provide a method of launching applications silently" & vbCrLf & _
                 "" & vbCrLf & _
                 "Usage:   " & vbCrLf & _
                 "--------" & vbCrLf & _				 
                 "" & vbCrLf & _
                 "hidden.vbs application <arguments>" & vbCrLf & _
                 "" & vbCrLf & _
                 "" & vbCrLf & _
                 "Sample usage:" & vbCrLf & _
                 "-------------------" & vbCrLf & _				 
                 "" & vbCrLf & _
                 "Hidden.vbs Powershell.exe -ExecutionPolicy Unrestricted -File C:\IT\PowerShell\PDF_Fix.ps1" & vbCrLf & _
                 "" & vbCrLf & _
                 "Hidden.vbs Install.bat" & vbCrLf & _
                 "" & vbCrLf & _
                 "" & vbCrLf

End Sub

Troubleshooting Script for Windows 10 Start Menu Issues

Since a lot of people are having issues with the start menu tiles in their images, I decided to create the following script to help others troubleshoot some common issues that may occur.

Note: This script is compatible with Windows 10 1709 and above.

The script will run through the following checks:

  • Checks to see if C:\Users\Default\AppData\Local\Microsoft\Windows\Shell\LayoutModification.xml exists
  • Checks if the current user’s LayoutModification.xml matches the default profile’s LayoutModification.xml.
  • Opens C:\Users\Default\AppData\Local\Microsoft\Windows\Shell\LayoutModification.xml so you can confirm whether or not this is the XML file that you imported in your OSD process.
  • Checks to see if HKCU:\Software\Microsoft\Windows\CurrentVersion\CloudStore\Store\Cache\DefaultAccount\$start.tilegrid$windows.data.curatedtilecollection.root is causing the issue.


Download The Script Now!

$CurrentUserStartMenu = "$env:LOCALAPPDATA\Microsoft\Windows\Shell\LayoutModification.xml"
$DefaultStartMenu = "C:\Users\Default\AppData\Local\Microsoft\Windows\Shell\LayoutModification.xml"


If((Test-Path "$DefaultStartMenu") -eq $False) {

    Write-Host -ForegroundColor Red "$DefaultStartMenu does not exist!"
    Write-Host -ForegroundColor Green "Possible Solution - Use Import-StartLayout to import your start layout (You will need to login as a new user to see the changes)"
    
    $Prompt = Read-Host -Prompt "Press any key to exit"
        
    If($Prompt -ne $Null) {

        Return

    }

}
Else {

    If((Get-FileHash $CurrentUserStartMenu).hash -ne (Get-FileHash $DefaultStartMenu).hash){

        Write-Host "The default profile layoutmodification.xml and the current user's layoutmodification.xml do not match!" -ForegroundColor Red
        Copy-Item "C:\Users\Default\AppData\Local\Microsoft\Windows\Shell\LayoutModification.xml" "$env:LOCALAPPDATA\Microsoft\Windows\Shell\LayoutModification.xml" -Force
        Remove-Item 'HKCU:\Software\Microsoft\Windows\CurrentVersion\CloudStore\Store\Cache\DefaultAccount\$start.tilegrid$windows.data.curatedtilecollection.root' -Force -Recurse
        Get-Process Explorer | Stop-Process

        $Prompt = Read-Host -Prompt "Is your custom start layout visible when you launch the start menu? (YES, NO)"

        If($Prompt -like "Y*") {

            Write-Host "Solution - Copying the default profile's layoutmodification to $env:LOCALAPPDATA\Microsoft\Windows\Shell\LayoutModification.xml fixed the problem" -ForegroundColor Red
        
            $Prompt = Read-Host -Prompt "Press any key to exit"
        
            If($Prompt -ne $Null) {

                Return

            }

        }
        Else {

            Write-Host "Unable to determine a solution" -ForegroundColor Red
        
            $Prompt = Read-Host -Prompt "Press any key to exit"
        
            If($Prompt -ne $Null) {

                Return

            }

        }


    }

    Write-Host -ForegroundColor Red "Confirm that the default start layout is the same start layout that you imported"
    Start-Process Notepad -ArgumentList "$DefaultStartMenu"

    $Prompt = Read-Host -Prompt "Is this the same layout that you imported? (YES, NO)"

    If($Prompt -like "Y*") {

        Remove-Item 'HKCU:\Software\Microsoft\Windows\CurrentVersion\CloudStore\Store\Cache\DefaultAccount\$start.tilegrid$windows.data.curatedtilecollection.root' -Force -Recurse
        Get-Process Explorer | Stop-Process
        
        $Prompt = Read-Host -Prompt "Is your custom start layout visible when you launch the start menu? (YES, NO)"

            If($Prompt -like "Y*") {

                Write-Host 'Possible Solution - Delete Software\Microsoft\Windows\CurrentVersion\CloudStore\Store\Cache\DefaultAccount\$start.tilegrid$windows.data.curatedtilecollection.root from C:\Users\Default\NTUser.dat' -ForegroundColor Green
                
                $Prompt = Read-Host -Prompt "Press any key to exit"
        
                If($Prompt -ne $Null) {

                    Return

                }

            }
            Else {

                Write-Host "Unable to determine a solution" -ForegroundColor Red
                
                $Prompt = Read-Host -Prompt "Press any key to exit"
        
                If($Prompt -ne $Null) {

                    Return

                }

            }

    }

    Else {
        
        Write-Host "Possible Solution - Replace C:\Users\Default\AppData\Local\Microsoft\Windows\Shell\LayoutModification.xml with your custom LayoutModification.xml(You will need to login as a new user to see the changes)" -ForegroundColor Green
        
        $Prompt = Read-Host -Prompt "Press any key to exit"
        
        If($Prompt -ne $Null) {

            Return

        }

    }

}

How to prevent the Edge shortcut from appearing on a desktop after the Windows 10 1803 upgrade

During my early testing of the Windows 10 1803 upgrade, I have noticed that Microsoft is now creating an Edge shortcut on the desktop.

This shortcut is not in the default profile but you can disable the functionality by running the following command:

reg add HKLM\SOFTWARE\Microsoft\Windows\CurrentVersion\Explorer /v "DisableEdgeDesktopShortcutCreation" /t REG_DWORD /d "1" /f